Peanut Butter + Jelly French Toast
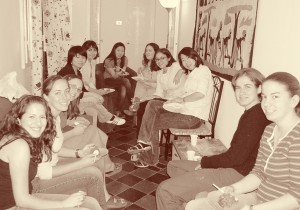 One of my fondest cooking memories is one of the last meals I made while studying abroad in Florence, Italy. At the time, I was living in a three bedroom apartment with five other college students, each of whom had different schedules, cooking methods, and eating habits. For most of the spring, I made meals for myself, usually around 6 pm, and was in bed by 9 or 10 pm–when my roommates were just getting started on dinner. During our last week in Italy, I invited my roommates and friends over for a brunch-themed dinner in the apartment. I love breakfast food, so I figured it would be a breeze to cook everything. Plus, I wanted my friends to be able to customize their own meals. So the main dish became this Peanut Butter + Jelly French Toast. Each person could choose her own filling (peanut butter, Nutella, bananas, honey, etc.) and top with a homemade strawberry sauce, honey, jam, or pancake syrup (no maple syrup in Florence!). The French Toast was a huge hit and a few of my friends still talk about it, eight years later. One of those friends is getting married this weekend and I honor of her and her new life with her soon-to-be-husband, I decided to post up this recipe.
Peanut Butter + Jelly French Toast
(adapted from Better Homes and Gardens “Stuffed French Toast,” BHG.com, 2004)
For French Toast
1 cup peanut butter
1 large loaf of crusty Italian or French bread, cut into 16 ¾-inch slices
4 eggs whites
2 eggs
1 ½ cups milk
Dash of salt
1 tsp vanilla
1–2 Tbsp sugar (optional)
½ tsp cinnamon
Unsalted butter
For Topping
1 cup jam, jelly, or spreadable fruit in flavor of choice
Directions
- Preheat oven to 200°F. Spread 2 Tbsp of peanut butter on eight of the bread slices. Top each with a plain slice of bread to create sandwiches.
- In a medium bowl, whisk the egg whites and eggs until combined, gradually adding in milk. Add in salt, vanilla, sugar (if using), and cinnamon and stir to combine.
- Heat about 1 tsp of butter on a griddle or skillet over medium heat until butter bubbles. Dip both sides of a sandwich in the egg mixture. Cook sandwich on each side until golden brown, turning as necessary so that the peanut butter gets heated and melts slightly. Transfer to baking sheet and put into oven to keep warm. Transfer half the egg mixture to a shallow baking dish. Set remainder aside in case more is needed later. Repeat with remaining sandwiches.
- Meanwhile, heat jam in small saucepan over medium low heat until melted, stirring occasionally to smooth and prevent burning. Pour into small bowl or syrup pourer for serving.
- To serve, cut each sandwich in half, allowing peanut butter to ooze out, and top with melted jam. Also try other toppings, such as maple syrup, melted chocolate, warm honey, or make your own fruit sauce. Other ideas for fillings include cream cheese with fresh fruit, Nutella, or other nut butters.
I have a tendency to zone out. Wander off to another place for a minute. Maybe a quarter-hour. I guess I get it from Ms. Jannie. Probably Mom too. People say Ms. Jannie could go into space. Even when she was out with family having dinner. People watching. Examining the latest fashions. Inspecting posture and cleanliness. Those things can tell you a lot. It’s anthropological. Observation only.
Public transit perfects the zone out. Everyone is a stranger. To keep occupied, I move outside myself. Take in surroundings. I let my brain overstimulate. Give my eyes permission to stare. Behind whatever sounds speakers jam into my ear canals, someone laughs way too loud. Was it really that funny or you just wanna impress the girl next to you?
Then there’s the asshole who interrupts. Throws the balance off and causes a mental trip. What did he just say to me? Called me a WHAT? Doe-eyed idiot. The 8-track in my brain skips. Sometimes I manage a fuck you! Or present an elegant middle finger (also inherited from Ms. Jannie). Never as good as what I come up with after I switch to the bus or stand stewing in the elevator.
My best lines come back home in my tiny living quarter. 298 square feet of coulda-woulda-shoulda. I want to punch something. Break something. Scream. But I don’t. Don’t want to damage stuff I’ve used hard-earned cash to pay for. Get kicked out of my apartment. Have the bratty co-ed next door think I’m nuts.
I take it out on pillows. Poor pillows. They’ve done nothing wrong. ‘Cept being malleable. Suppose the next step would be a punching bag, but that would look weird in the middle of my living-/dining-/bedroom/office.
Typed in iPhone Notes App.
Late afternoon, February 13, 2012.
Northbound Red Line, Chicago, IL.
Translating the personal into public for conceptual action and art has been my focus as a graduate student at the School of the Art Institute of Chicago. In particular, I investigate identity formation and societal pre-judgments. I am interested in how tightly point of view is rooted in identity—a unique combination of traits and experience, both familial and cultural. Much of this is outside the individual’s control, yet defines what we see. Most recently, my work concerns itself with the tension of a personal sense of identity that conflicts with cultural expectations, and how that affects and limits personal and relational mobility. The work inquires into how identity navigates the bewildering space between polar opposites.
- What + Where: Collection of text-laden pieces to be placed in public and private spaces, interiors and exteriors
- How: Printing, bookbinding, and design + fiber objects + written works
- Why: Present personal view of polarizations within contemporary American society to a broad audience • Address consequences of biology, environment, and society on development of personal identity • Convey the comfort/discomfort of these polarizations that is felt in public, but acted upon in private
Components
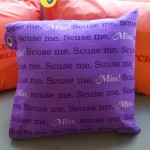
Sculptural fiber-based pieces. These are multi-layered pillows that initially suggest comfort, but create a different sensation upon closer examination. The texts on the pillowcases are actual statements that have been said to me publicly by fellow black Americans in the Chicago area. The audience is encouraged to dismantle/reassemble the pillows and, in a performance setting, I will recite writings that correlate with each fiber piece.
Descriptive card and stereotype tags. The cards contain intimate texts coupled with explanations of how the pillows are used and what they represent. An offset printed tag is attached to each pillow, displaying a representation of the stereotype placed upon me by the original speaker of the statement, as well as the date and location in which the statement took place.
Exhibition. Fourteen pillows—each layered with hand-dyed, screen-printed pillowcases—are placed on a daybed and enclosed on two sides by dyed and screen-printed panels which represent the space between the societal opposites of “blackness” and “whiteness.” This creates a semi-personal space for viewers to interact with the pillow forms and discover the discomfort of polarizing or stereotype-based statements.
Future iterations. This is an on-going project, as statements and observations are made on a daily basis. The hope is to continue the production of the fiber pieces and their corresponding printed materials, in addition to publishing the written works, presenting them to broad audiences for inquiry.
For full documentation of the process for this work, please visit the SAIC 2012 Visual Communications MFA blog.
This was actually my second year participating in the Super Bowl Chili Cook-Off, put on by one of my friends and classmates. Last year, I made a white chili with chicken that turned out okay (in my opinion, the chicken was overcooked), but it didn’t stand a chance against the competitors who shot and dressed a deer for their award-winning venison chili. Although the traditional ground beef/pork chili with tomatoes and beans usually reigns supreme in these types of contests, I still believed that “something a bit different” was the way to go: if my chili didn’t taste (or look) like anyone else’s, there would be less to compare to it to, right? This time around, my logic worked. Instead of chicken, I chose a pork chili recipe, both for its flavor and for the decreased risk of overcooking the meat. Additionally, I used hominy in place of beans; it worked better with the flavors in the chili and made the dish that much more unique—more of a Mexican chili than the American standard. And I guess the judges (my peers and guests of the party) thought it was pretty unique, too. I’ve got the gold medal to prove it! ![]()
Red, Gold & Green Chili
(adapted from “Pork Chili with Tomatoes,” Bon Appétit, January 2000)
For chili
2 7-oz cans green chilies
2 fresh poblanos and 2 jalapeños (may use canned poblanos and jalapeños instead)
7 1/2 lbs boneless pork loin, trimmed, cut into 1-inch pieces
6 Tbsp all purpose flour
6 Tbsp vegetable oil + 1 Tbsp bacon fat
6 cups coarsely chopped yellow onions
12 large garlic cloves, minced
2 tablespoons dried oregano
2 tablespoons ground cumin
6 cups chicken stock or canned low-salt chicken broth
2 28-oz cans diced tomatoes in juice
1 28-oz can hominy
For tortilla strips
5 (or more) flour or corn torillas, taco-size
2 Tbsp olive oil
Kosher flake salt
Zest of two limes
Directions
- Char chilies (if using) over gas flame or in broiler until blackened on all sides. Enclose in paper bag; let stand 10 minutes. Peel and seed chilies. Coarsely chop and puree in blender until mixture is the consistency of a paste.
- Place pork in large bowl. Sprinkle with salt and pepper. Add flour and toss to coat. Heat 3 tablespoons oil plus bacon fat in heavy large wide pot over high heat. Working in batches and adding more oil as needed, cook pork until brown on all sides, about 6 minutes per batch. Using slotted spoon, transfer pork to large bowl.
- Reduce heat to medium. Add a couple of tablespoons of chicken stock to deglaze pot. Add onions to same pot and stir until tender, about 6 minutes. Add garlic, oregano and cumin; stir 2 minutes. Return pork and any accumulated juices to pot; add stock, chili paste (the more you add, the hotter the dish will be), and tomatoes with juices and bring to boil. Reduce heat and simmer uncovered until chili thickens and meat is very tender, stirring occasionally, about 2 hours. Add hominy and heat through. Season to taste with salt and pepper.
- For tortilla strips, cut tortillas into 1/2″-wide strips. Using a pastry brush, coat strips lightly with oil. Transfer strips to a parchment-lined baking sheet and sprinkle with salt and lime zest. Bake at 350° until strips are golden and crispy. Allow to cool on a baking rack. Serve with the chili, along with shredded cheese and lime wedges.
Pro-Tip!
To tame the heat of fresh roasted poblanos, Chef Pati Jinich suggests steeping the peppers in boiling water with a bit of brown sugar. This brings down the heat while adding a touch of sweetness (The Chew, 03.13.13, Season 2, Episode 12).
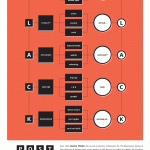
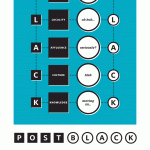
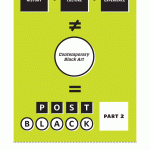
Post Black
Fliers for a lecture and conversation with Hamza Walker at the School of the Art Institute of Chicago.
2011. Client: Multicultural Affairs, School of the Art Institute of Chicago. 4-color design for printing on white cardstock, 11″ x 17″ (poster) and 5 1/2″ x 8 1/2″ (fliers).


